Introduction
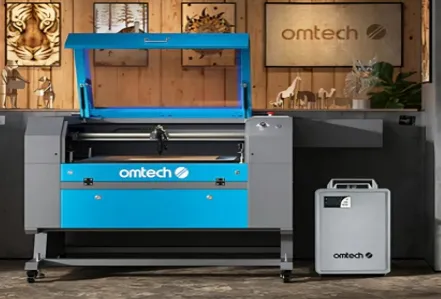
Personalized bookmarks are the perfect blend of practicality and style. A leather bookmark, in particular, adds a touch of elegance to any reading experience, and creating your own means it’ll be truly unique. If you love crafting, using a laser cutter is a fun way to explore detailed designs that would be challenging to create by hand. For this project, the OMTech laser cutter shines as the ideal tool, offering both precision and ease of use, whether you’re cutting delicate lines or engraving intricate designs.
Materials Needed for Your Laser-Cut Leather Bookmark
Before diving into the project, let’s gather everything you need. Here’s a list of essentials:
- Leather sheet (genuine or faux, depending on preference)
- OMTech CO2 Laser Cutting Machine– ideal for accurate leather cut and engraving.
- Adhesive or glue (optional, if you want to add layers for thickness)
- Magic eraser or a gentle cloth for cleaning any residue
- Leather conditioner or sealant for finishing (optional)
Step 1: Preparing the Design File (SVG or DXF Format)
Creating a design for your bookmark can be as simple or complex as you like. You can either create a unique design using vector graphics software (such as Adobe Illustrator, CorelDRAW, or Inkscape) or download ready-made SVG or DXF files online.
- Software Options: OMTech cutters work well with popular design software, making it easy to adjust and personalize designs.
- Design Suggestions: Consider a nature theme, initials, or a favorite quote for added personal touch.
Step 2: Setting Up Your OMTech Laser Cutter
Setting up the OMTech laser cutter for this project is straightforward. Here’s how to get started:
- Position the Leather: Place your leather sheet flat on the cutting bed, ensuring it’s secured so it won’t move during cutting.
- Adjust the Focus: Adjust the focus to suit the leather’s thickness; this will help get clean, precise cuts.
Safety Note: Always wear protective eyewear and ensure your workspace is well-ventilated. Leather, especially faux leather, can emit fumes when cut.
Step 3: Choosing Laser Settings for Leather Cutting and Engraving
Laser settings are essential for a successful cut and engraving on leather. OMTech’s user-friendly interface allows you to fine-tune these settings easily. Here’s what we recommend:
- Engraving Settings: Set the power to a moderate level (e.g., 20–25%) with a higher speed for engraving to avoid burning.
- Cutting Settings: Use higher power (e.g., 50–60%) and a slower speed to ensure clean cuts through the leather.
Step 4: Engraving and Cutting the Leather
With your leather positioned and settings adjusted, you’re ready to engrave and cut. Follow these steps:
- Align the Design: Double-check the alignment to make sure your design will be centered on the bookmark.
- Engrave First: Start by engraving any decorative elements or text.
- Cut the Shape: Once engraving is done, proceed with cutting the bookmark shape.
Step 5: Cleaning and Finishing Touches
Once your bookmark is cut, some finishing touches will make it look polished and professional.
- Clean Up: Use a magic eraser or a gentle cloth to wipe away any burn residue from the leather’s surface.
- Conditioning (Optional): For a more refined look, apply a leather conditioner or sealant to protect the bookmark and bring out its natural color.
Tips for Personalization and Customization
Now that you’ve mastered the basics, here are some ideas for taking your bookmark to the next level:
- Add Initials or Quotes: Personalize your bookmark with initials or a short quote.
- Experiment with Different Leather Types: Different leather types (e.g., veg-tanned, suede) can create unique looks.
Conclusion
Congratulations! You’ve created a custom leather bookmark that’s both functional and stylish. By using the OMTech laser cutter, you’ve experienced the ease and precision it brings to DIY projects, making it an invaluable tool for creative enthusiasts.
